brand logo
StylingContentNew SectionInteractions

Instructions

Here you'll find all the information you need to start filling in your content and making some basic changes to your template!

If you're not completely familiar with Webflow and how it works, I recommend checking out the Webflow 101 Course on the Webflow university. This will teach you all the basics so you feel a bit more comfortable messing around with the styling. If you ever get stuck, don't hesitate to reach out for some help, I'm more than willing to lend a hand!

Styling

Colors

All of the colors in Restaurant's color palette are saved as variables, this means they can be edited and the changes will occur sitewide.

If you'd like to edit the templates colors, simply head to the variables tab in the sidebar, from here you can view all of the sites variables, but most importantly the colors. You can now just simply click on a color value for one of the variables and edit it. This will change all instances of this color found all over the site.

Adding/Changing Content

Static Content

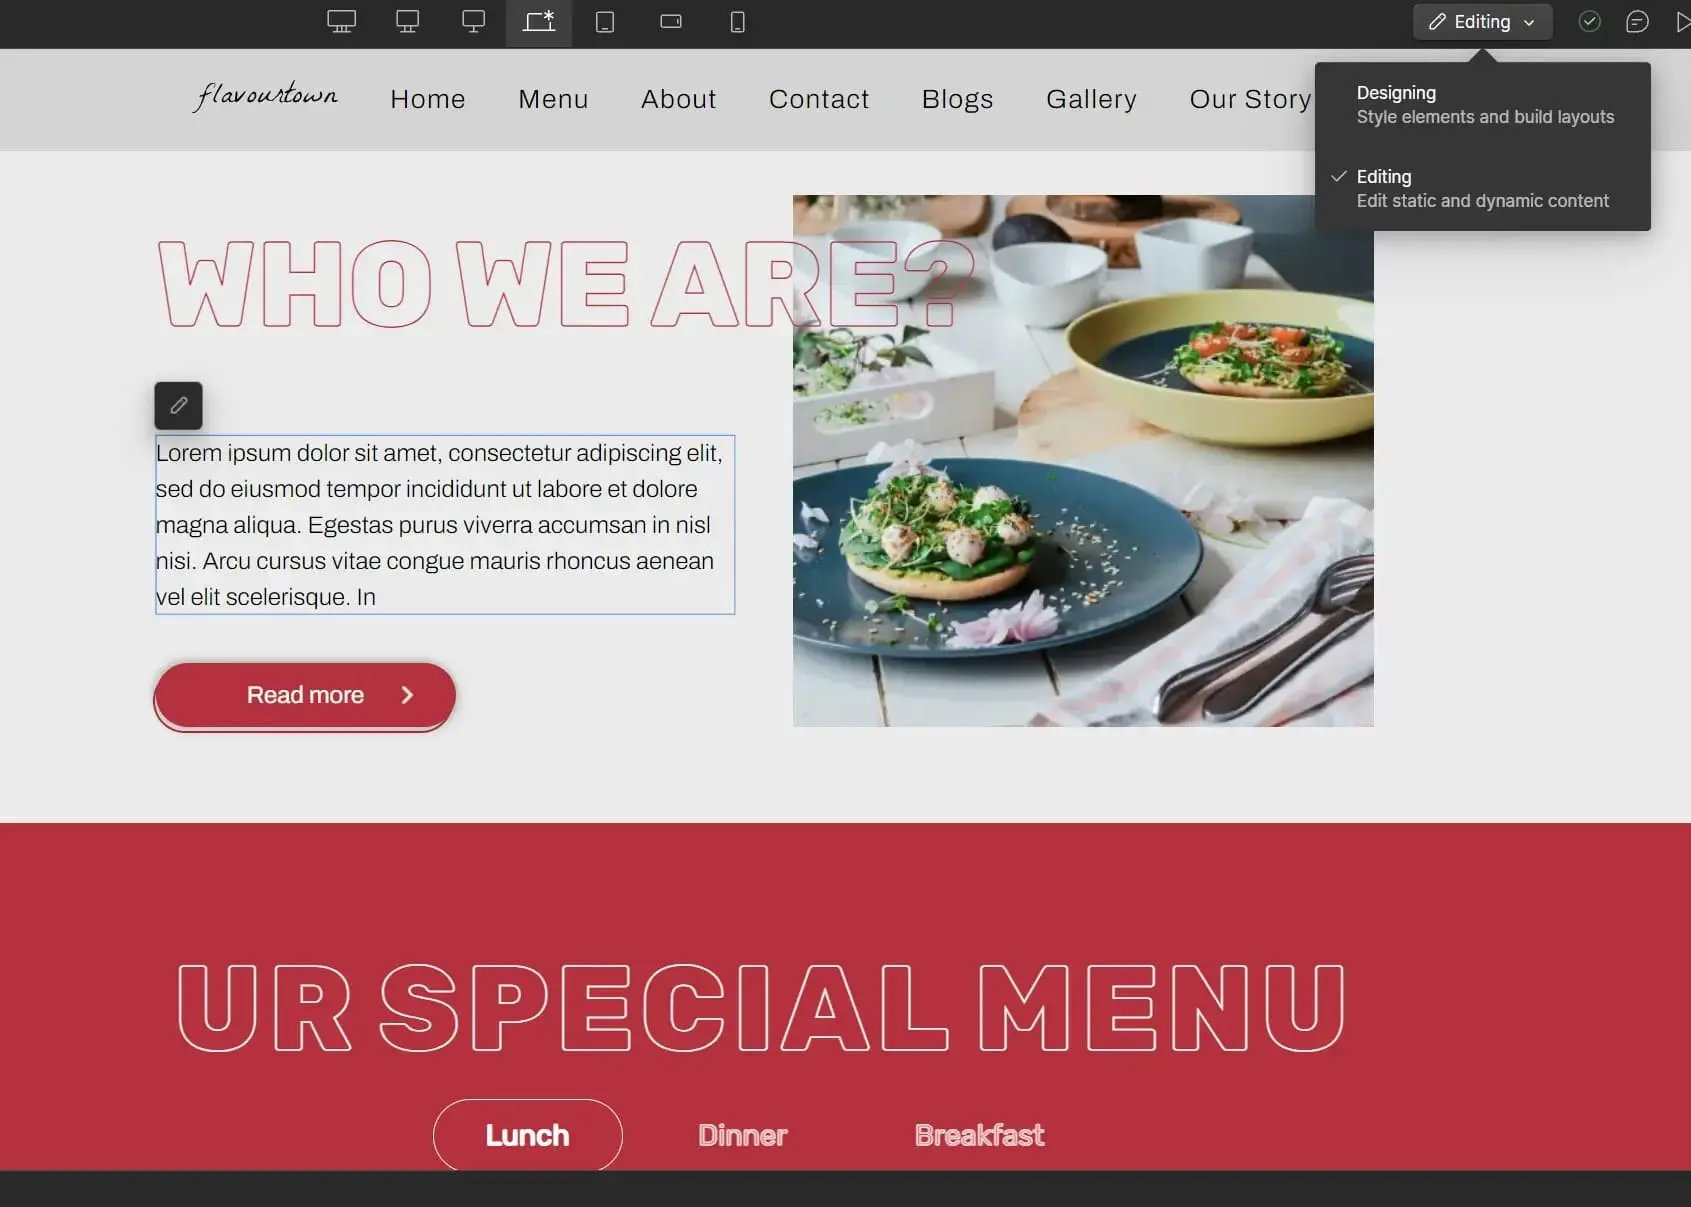
The easiest and simplest way to change content on the site is through Webflow's editor. This is separate from the designer and lets you adjust text and images without the overwhelming UI! To access this when in the designer, click the 'Designing' button in the top right, and then pick the 'Editing' option in the drop-down. These edits will go live the next time you publish the site.

screenshot displaying the Webflow designer UI

CMS Content

there are 6 CMS collections in total. we will be talking about each one of them separately.
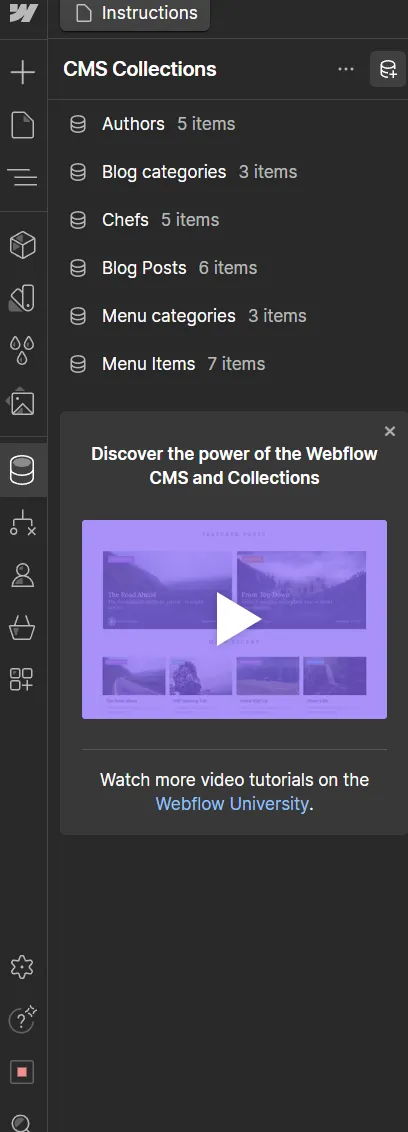
screenshot displaying the Webflow designer UI

Blog Posts

As the name suggests these are used to show blog posts/articles for your website. they can be seen on these pages: Home, Blogs, blog category collection page, author collection page, blog posts collection page. the "featured?" field can be used to display the blog on the home page.

Blog Categories

Blog categories are used to separate blogs into different categories. each blog can only belong to one category and you can choose a blogs category by using the Category field in Blog Posts. blog categories can be found on blog categories page.

Authors

Authors are shown on the blog posts collection page and the author collection page. a single author can write multiple blog posts. the blog posts a author is responsible for can be set using the blogs field. make sure to set the author for each blog on the Blog Posts collection as well.

Chefs

Chefs are shown on the about-us and the chef collection page. the Hierarchy Of Chefs field is used to display the job/position of the chef inside your kitchen.

Menu Items

Menu Item are the main foods that are being sold in your restaurant. they can be found in these pages: Home, Menu, Menu Items collection page, Menu Categories collection page. sauce and tutorial video are optional.

Menu Categories

Menu Categories are similar to blog categories and are used to separate the menu items into different categories.

Creating New Sections

Adding New Sections

For creating a new section start by adding a new section element. After that add a container element to the section and give it a class of "container". Finally add a div inside the container to hold the element you want to add to your site.

screenshot displaying the Webflow designer UI

Comments

How to edit comments

comments section's(found on menu item collection page) content can be edited in the CMS. There are up to 4 comment slots and if there are less than they will not be displayed. Also if the first comment is not set than the entire section will not be displayed.

Interactions

Editing the menu burger

the menu content is placed inside of .nav-menu and by setting the top property to 0vh and setting the display value for these three classes to flex(.menu-info, .nav-menu-links, .nav-menu-secondary-links) the menu modal content becomes fully visible in the designer. and reversing this process the menu will go back to normal.

screenshot displaying the Webflow designer UIscreenshot displaying the Webflow designer UI

Showing menu item image

There are two interactions set for our menu items for hover in and hover out. Here is how they work. For hover in we use "Show menu item image on hover in" to move the menu item image to the right side of the menu and turn its opacity from 0 to 100 so that it becomes fully visible.

screenshot displaying the Webflow designer UI

than we do the reverse on hover out.

screenshot displaying the Webflow designer UI

Home birthday comments

We set the "Show home comments while scrolling" animation to trigger on the section being scrolled. There are 3 main effects being used while the user is scrolling through this section, First one is the comments being selected. each comment goes through 4 different states(except the first one that only has 3 states) first state is the comment not being selected in this state the comment has low opacity and width.

screenshot displaying the Webflow designer UI

the second state happens 15% after the previous one. here the comment has full opacity and has full width.

screenshot displaying the Webflow designer UI

for the third state the comment stays the same as the previous one but for only 5%.

screenshot displaying the Webflow designer UI

lastly we de-select the comment by again reducing the opacity and width back to the original state's width and opacity.

screenshot displaying the Webflow designer UI

we repeat these for the rest of the comments and use combo classes to separate them(is--second, is--third...). For the second effect we move the corresponding birthday picture into view while the comment is selected. We repeat these until the last birthday picture

screenshot displaying the Webflow designer UIscreenshot displaying the Webflow designer UI

for the third effect we move the customers comment and date of up and increase its opacity from 0 to 100. keep it at revealed (just like the comment) and reduce its opacity to 0 after 5%.

screenshot displaying the Webflow designer UI

Our Story

The history section found on the our story page uses webflow dropdowns. so they can simply be opened by going to the settings after clicking on the drop down and choosing the show option. Now you can change the content inside the designer and once you are finished click on hide to hide the contents.